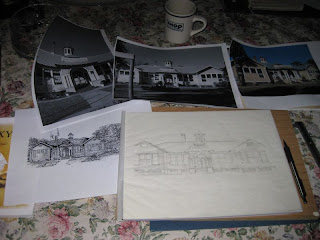
The project on the board right now is creating a scalable vector image of the main building of the Florida Pioneer Settlement for the Creative Arts. This would be used for anything from Stationery Letterhead to Name Badges to Greeting Cards. Initially I sought for line art already created. Surely in the past one hundred years of this structure's history somebody did some sort of high contrast (pen and ink, likely) rendering. But all I could find was a hopelessly re-photocopied image that was of no use for conversion to Vector.
So . . . I was on my own.
I did a photo-shoot of the place in an attempt to capture the heavily tree shaded building's very unique front and cupola without so many tree branches in the way. It was nigh unto impossible. I had to shoot images closer than my design requirements. So just shooting black and whites, running them through a Cut Line Filter or some other photoshop trick to produce tertiary shades of gray out of dots, cross hatch lines or stipples were out.
So it was up to me using some good old tools I haven't touched in years: India Ink, Paper and my trusty fine tipped Rapidograph. For those who are not familiar with the Rapidograph pen: these were commercial artists bread and butter tools at one time. They are essentially hypodermic needles with a sort of piston inside which, when pressed tip down on the drawing surface, releases a quantity of ink from a pre-loaded cartridge.
So, with these basic but time tried tools, I stepped back to 1974 when I actually made money doing these sort of things. I was a calligrapher and free lance commercial artist. My last gig was illustrating a technical handbook up in Chicago back around 1991.
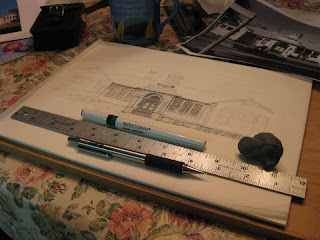
In the photo above you have tracing paper, Rapidograph pen, kneeded eraser, mechanical pencil (soft) and a cork-bottom steel rule. I won't be using Bristol Board this go-round because were not doing camera-ready art, were doing scanner ready art for vectorising.
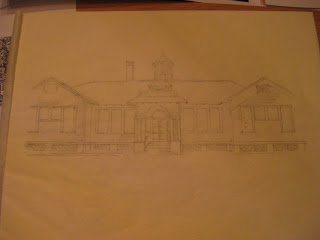
I did a direct trace of the main elements of the building. This would serve as a sort of framework for the ink fill, which will be the really time consuming part of the project.
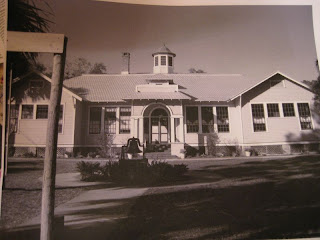
This is the photo that I used.
You can click on each photo for a larger image. So, this was Night One, laying out and tracing the image. Night Two, (tonight) was laying on the ink. I am using a combination of different strokes, primarily stipple rendering, essencially very small dots which are concentrated or spread out to give the effect of tones of grey. Not unlike half-tone dots. For some of the denser fields I make use of direct line and hatching.
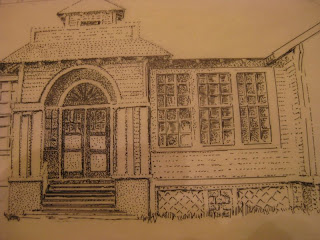
Above is a close up of the rendering. So much of pen and ink drawing is simply suggesting an object rather then contour drawing of it. It's what you do not draw that matters. My technique almost omits any highlight rendering, but rather I fill the shaded areas only. This adds a dimension of "believability" to a pen and ink image.
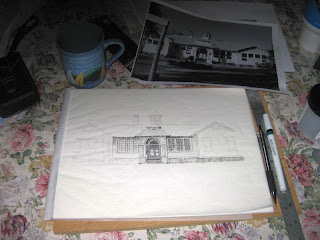
Above is what I managed tonight. About 40% of the ink is laid down. About four hours worth of work, plus one pot of coffee. The final two shots below are just other perspectives of the same thing.
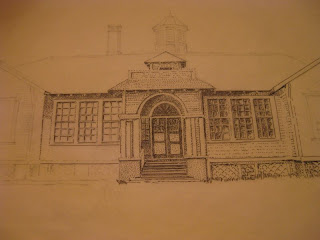
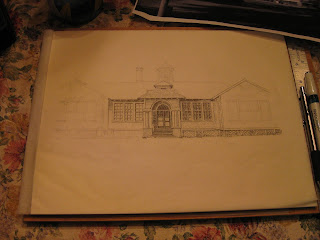
I am largely sharing these just to let folks know - in case they are interested and wondering - that good old fashioned hand rendering on artboard or Bristol board with india ink is still alive and well . . . at least at Q5 Studio and Pretty Good Letterpress, anyway. Another reason is to give you a peak into a little bit of how we "did it" in the past, as far as copy work prepared before the Computer Era. Of course, I use digital techniques as well, it's a great tool. But sometimes it just pays to grab a pen and "do it yourself". Keeps you in practice, too.
I may add one more note for those of you who think that computers have rubbed you out of relativity. I met a man who runs a company here in Central Florida, who designs props for Hollywood, specifically Steven Spielberg. He hires designers. He told me that before he hires a "graphic artist" that knows everything about Illustrator and In Design and Quark or FreeHand, he first sets them down at a drawing board and has them render - by hand - something. If they can't draw, he doesn't hire them, MFA or not! He told me that it starts with the hand and eye. If you can't design with the hand and eye using basic tools on paper, you will be lacking if you depend on the computer to make up for the deficit. So chin-up, fellow Old School Rapido-jockeys! There is need for you yet!
I will continue posting the progress on this project, all the way through the finished piece, doing the vector work (fingers crossed), sending the digital off to the Platers and receiving and running the final project.
I will continue posting the progress on this project, all the way through the finished piece, doing the vector work (fingers crossed), sending the digital off to the Platers and receiving and running the final project.
Stay tuned!
-gary

Great!
ReplyDelete